Long Lane Honey Bee Farms is a family beekeeping business designed to encourage, assist and educate others in the wonderful experience of beekeeping.
Visit Our Website at: www.honeybeesonline.com
Our photos and materials cannot be used without our permission.
Here we are again, David & Sheri Burns at Long Lane Honey Bee Farms with another fun lesson in beekeeping. In today’s lesson, I want to share some things that you should NOT DO! Why not learn from the mistakes of others? Before we get into today’s lesson, here’s an update from Long Lane Honey Bee Farms.
We had a lot of fun at our basic beekeeping course last Saturday. The students were great, the bees were cooperative and the weather was perfect. This coming Saturday is our Advance Beekeeping Course! We still have room for a couple more students to join us, so click here for more info. Stop repeating the same mistakes. Learn more and do better.
No one guessed our mystery photo on our last lesson. From left to right, a jar of sweet tea, a jar of honey with comb, and a jar of pickled eggs.
A few weeks ago I attended the Heartland Apicultural Society (HAS) meeting in Cookeville, Tennessee and it was great. I met several of you who follow our online lessons, have bought supplies from us, etc. While I was on an elevator I met Joel who bought a queen from us a few years ago. He recognized my shirt and said the queen was doing good. Another lady from Ohio introduced herself at lunch and mentioned that she really enjoys our lessons and has shared them with other beekeepers. The HAS, of course, had great speakers, hands on apiary workshops and more. For me, the highlight was listening to Dr. Clarence Collison. No one I know of holds a match to his knowledge of beekeeping and the honey bee. He writes a monthly column in the BEE CULTURE.
Speaking of Dr. Collison, he heads up the Eastern Apicultural Society’s Master Beekeeper program which I will be attending next month in Boone, North Carolina to go through my second year of testing. Several from our family will be going over for the whole week for the EAS beekeeping conference. The master beekeeping program consumes the last two days of the conference. If you can afford the time away, I would strongly encourage you to come and enjoy the conference. Outstanding speakers and workshops. It is absolutely the most superbly orchestrated beekeeping conference, ever! If you can’t come every day, you can chose the latter part of the week. It’s a blast. I hope to see you there. I’ll be wearing the yellow “Long Lane Honey Bee Farms” shirt like the one in the picture. For more information on the EAS conference Click Here.
LESSON 77: DON’T DO THAT
Okay, so you are enjoying beekeeping, but you’ve already made a few mistakes. Don’t feel badly, we all do it. Just don’t repeat the same mistakes every year. To help you avoid repeating mistakes and to help you avoid them all together, let me give you a list of things I’m calling the “Don’t Do That” list. Let’s go…
DON’T DO THAT
1) Don’t put off beekeeping, thinking you’ll do it later. Make a determined effort to start keeping bees next Spring. 2) Do not leave a frame out of a hive. Always put the frames back! If you don’t, you are guilty of violating bee space. The bees will nicely fill the vacant frame space with comb that you’ll never be able to work with.
3) Do not use a bee vac in the afternoon when the foragers are returning from their flights. The suction will pull out the honey from their honey stomachs and drown all the other bees in the vac.
4) Don’t drip honey or throw comb near a hive. Sometimes we need to remove burr comb from a hive. Carry it away from the hive. If you throw it on the ground next to the hive, robbers will smell the honey and comb and may be enticed to go into the hive and start robbing it. 5) Don’t use old equipment. American Foul Brood spores can live dormant in abandon hives and stored equipment for nearly 80 years and activate once you start using the frames or boxes.
6) Don’t dump out your smoker in dry grass. Don’t set your hot smoker down on your truck’s plastic bed liner or store it in the garage before it’s cooled down. And don’t blow sparks or a flame into the hive when smoking. 7) Don’t be caught without something to put a swarm in. Keep a spare hive on hand. As more people learn that you’re a beekeeper, you will receive calls to retrieve swarms. Be prepared.
8) Don’t assume your hive is doing well based on what you see at the entrance. Just because they are bringing in pollen does not guarantee they have a laying queen. Check your hive every 2 weeks and verify you have a laying queen by inspecting her brood pattern and checking for newly laid eggs.
9) Don’t forget your hat and veil. No matter how calm your bees may bee, anything may set them off. Always protect your head and face. (Especially if you have somewhere special to go that night!)
10) Don’t be an isolated beekeeper. You will benefit from joining your local association, attending conferences and classes and networking with other more experienced beekeepers.
11) Don’t place a queen excluder below a honey super with undrawn comb. Wait until the comb is starting to be drawn out, then check to be sure the queen is not in the super. Then you can place the queen excluder below the honey super.
12) Don’t allow your hive to become congested. While a crowded hive is a healthy hive, they may run out of empty cells for the queen to lay. Continue to monitor your hive to make sure the colony has room to expand.
13) Don’t cheat and harvest honey before it is completely sealed. If you harvest frames that are not sealed completely, your honey’s moisture level may be too high, causing the honey to eventually ferment, foam and taste like yeast.
14) Don’t be oblivious to pests and diseases in the hive. Know the most common pests and diseases and learn how to identify and treat your colonies if these show up.
15) Don’t force your bees to your neighbor’s swimming pool for water. Keep water around your property in the sun for bees to find. Bees can more easily detect polarized light so keep your water source in direction sun light because light is polarized once it reflects from the surface of water.
16) Don’t pull a frame out if it is really close to the frames beside it. You may “roll” your bees, even kill the queen. Remove a frame near the wall that is less tight, then slide the frames to allow room to freely lift each frame.
17) Don’t mix up your frames. When you pull out a frame, place it back in the same place and orientation.
18) Don’t work hives in poor weather. Bees are calmer on sunny days with higher barometric pressure. 19) Don’t take your chances with an old queen. Requeen every year or two. A younger queen’s pheromones will reduce swarming and she will lay more prolific.
20) Don’t give up! Beekeeping, for most, is an enjoyable hobby. Hobbyist become attached to their animals. When a hive dies, a beekeeper can become discourage and want to quit. This is understandable. But do not despair! If your hive dies, consider the good news:
1. You have drawn comb for next year’s package to build up faster.
2. You gained a wealth of skill and information for next year.
3. You have time to evaluate why your hive died and what you can do better next year.
Thanks for joining us for another beekeeping lesson from Long Lane Honey Bee Farms. We’ve given you 20 “don’ts” today, advice to help you avoid the most common mistakes.
We hope you enjoyed today’s lesson and if you want to leave a little tip on the table for the service you received from today’s lesson, we would appreciate any donation. You can click on the link below to leave a donation of any amount.
This is actually a previous lesson, lesson 75 about laying workers. Due to a technical glitch, we lost it from our list of lessons and will now have to send it out again in order for it to appear. Sorry for the second sending.
Hello from David & Sheri Burns at Long Lane Honey Bee Farms!
Beekeeping just keeps getting better and more fun. To the basic beekeeper, beekeeping can be seen as enjoyable but challenging at the same time. Some newbies become panicky and micromanage their hives, worried about every little things. Most of this fear comes from not being informed, lacking beekeeping experience and not having a reliable mentor who can answer your questions. That is why we offer these free lessons, to educate and encourage beekeepers to keep bees with confidence. We hope to be one of your mentors.
The more we know about bees the better we are at keeping bees. Let me give you an example. Some may think they have a poor queen because she is not laying well. Did you know that how well she lays is determined by how well she is fed? Prior to a hive swarming, the hive reduces feeding the queen and her laying slows down or stops. Perhaps during a dearth or a rainy spell if nectar and honey stores in the hive are low, the queen may not be fed well, and though she is a good queen, the weather is influencing her ability to lay.
There are some things to worry about, like a laying worker. I always hate to see a hive with a laying worker. Rarely is there just one laying worker. usually there are many. Workers do not have fully developed reproduction rights and they do not mate with drones which means if and when they do lay eggs, they are not fertile eggs and will become drones. Laying workers lay between 10-30 eggs a day compared to a queen who lays between 1,000-3,000 per day.
Since workers lay eggs that become drones, the hive will quickly crash because drones do not forage and cannot help the hive survive. Since there is no longer a queen, there are no workers coming down the line to expand and care for the hive. It’s very serious and difficult to revive. Many say the only thing to do is divide the comb up into other strong hives. An ounce of prevention is worth a pound of cure.
HOW TO PREVENT LAYING WORKERS FROM RUINING YOUR HIVE
First, you must realize why workers start laying. The queen’s pheromones and the pheromones of the open brood suppresses the underdeveloped reproduction of the workers from laying. So as long as you have a good laying queen, the laying workers will never be a problem. Most agree that all hives have some laying workers, even in a queenright hive, but that they can never get a foothold to cause any real issues.
So how do you prevent this from happening? Always make sure you have a strong, and young queen heading up the hive. The younger or newer she is, the stronger her pheromones and her brood pheromones are to suppress laying workers.
Once a queen is lost, laying workers will become a problem within 2-4 weeks. So by checking your hive every two weeks and carefully examine the frames for a good brood pattern and lots of eggs, you will avoid laying workers. If you see that you are queenless, order a new queen immediately. I’ve always suggested that beekeepers should have a few 5 frame nucs with a good queen in it just in case you need her in a hurry. Usually it takes time to order a queen and have it shipped.
HOW TO REMEDY A HIVE WITH A LAYING WORKER
Some say to dump the bees some 20 or so yards away and make them all fly back to the hive, assuming that the laying worker has never flown and therefore cannot find her way back to the hive. I would not trust this method. There is more than one laying worker, and I’m not convinced that she cannot fly back to the hive.
I have found a few useful techniques:
1) CAGE A QUEEN IN A PUSH IN COMB CAGE
2) MOVE A FRAME OVER WITH OPEN BROOD AND A QUEEN.
A colony with a laying worker will rarely accept a queen the traditional way. They will almost always kill the new queen. The laying worker is a fake queen, but she is good at deception. She emits pheromones which makes her followers follow her.
If you place a queen in a push in cage, a cage made of hardware cloth that pushes into the comb, then the new queen can lay and spread her pheromones in the hive without being accessible to the other bees trying to kill her. After her pheromones and the pheromones of her new open larva spreads, she can be released from her cage. This works well the larger the cage and place it over open cells and emerging brood.
A second method is to move over a frame of open larva with the queen on it. Make sure the frame is from a strong hive with plenty of bees on the frame. When you place this frame into a hive with a laying worker, be sure to place the new frame against the wall of the hive and with the queen on the side closest to the wall to give her protection from the laying worker and her followers. The hive that you removed the queen from is now queenless, but you can introduce a queen the traditional way.
Since drone cells are larger in diameter, when a laying worker lays none fertile eggs in a worker cell the emerging drones are smaller but sexually viable.
Why can’t we just find the laying worker and kill her? It’s a needle in a haystack. Besides, if you happen to find one in the act of laying, chances are high that there are several more.
Having a laying worker is always the result of a lack of timely inspections by the beekeeper.
Thanks for joining us today for lesson 75 and we hope today’s lesson will help you now understand how to avoid a laying worker and what to do if it happens to you.
Before I go, let me thank you for sharing these lessons with your friends and fellow beekeepers. We appreciate the exposure. And, don’t forget to check out our upcoming classes at our honey bee farm. We have lots of classes over the next three months. Click here for more info!
Here at Long Lane Honey Bee Farms, we raise our own Pioneer Queens, from survival stock and other proven stock. They are queens that are raised in the North, and from colonies that have never been treated with chemicals and have survived an Illinois winter. However, they are in big demand. The way we sell our queens is on a first come first serve basis. Early on every Monday, I go out and gather all the queens that are mated and laying a good brood pattern. Then, starting at 8:30 am Central Time we begin taking calls for those wanting to purchase our queens. We are usually sold out within the hour. We do not take advance orders. So it’s kinda like calling into a radio show trying to win a prize, just keep calling back in if you get a busy signal.
Here’s our information and our summer hours:
Summer Hours:
Mon – Thur 8:30 am – 4 pm Central Time
FRI-SAT visits & pickups by appointment only
Long Lane Honey Bee Farms
14556 N. 1020 E. Rd
Fairmount, IL 61841
(217) 427-2678
www.honeybeesonline.com
Hello from David & Sheri Burns at Long Lane Honey Bee Farms!
Is there any better life than that of a beekeeper? I’ve kept bees long enough now and have such a love for bees and beekeeping that I even don’t mind being stung. You can always tell a new beekeeper from a seasoned beekeeper because the new ones tell you how many times they’ve been stung and where. Seasoned beekeepers have lost track and don’t care and know you don’t care to hear about bee stings :) Here at Long Lane Honey Bee Farms we are in full queen production! Queens, queens, queens, everywhere there are queens in all stages. My youngest daughter Karee has work along side of me for 3 year now in our queen rearing operation and she’s a pro! All day long we are grafting, transferring cells, marking mated queens for sale, and dividing hives for more mating nucs. Karee knows the whole operation and is a great grafter too. Our bees help out a bunch with our own garden. Here’s mating nuc number 40 doing double duty. Producing queens and pollinating our gardens. We enjoy garden, chickens, bees and generally living out in the country! We are in our 6th year now in the country and it’s a hoot. GUESS THE PHOTO! Sheri took this picture of everything we made from our own property in these three containers. Anyone know what’s in the jars? The middle one is obvious, so good luck on the other two. You can click on the photo to enlarge it.
LESSON 76:The Success of Your Hive is Riding on Your Queen
You must keep an eye on your queen and make sure she has a great laying pattern. As we hit middle summer and slide down into fall beekeepers are more likely to kill their queen during super removal, or queens can fail toward fall. Don’t go into winter with an old queen or a missing queen.
There are three caste of bees in a hive: 1) The female worker bee, underdeveloped reproductive ability, 2) The male drones who only mate high in the air with virgin queens, then die and 3) The queen. When a hive makes a new queen, they do so from a fertile egg laid by a queen. They feed this young, three day old larva or younger, a special queen royal jelly and build out the queen cell perpendicular to the comb. It looks like a peanut shell. From the time the egg is laid until the queen emerges requires 16 days. Workers take 21 days to emerge and drones 24 days.
When the queen emerges she, of course, is a virgin queen or what some call an unmated queen. The queen only mates one time outside the hive. A few days after emerging, she will take her mating flight and fly away from her hive several miles to a drone congregation area (DCA). The DCAs are 40 feet or higher and have been an established meeting place for years. The DCA is a place where hundreds of drones hang out in the afternoon seeking a virgin queen. Virgin queens somehow know where the DCAs are and will mate with 12-20+ drones. She may take several mating flights over the course of a week, but once mated she will never leave her hive again unless the hive decides to swarm. For reproductive swarms, the original, old queen will leave with 60% of the bees and the 40% left behind will be headed up by a new queen. The queen mates with many drones in order to increase the genetic mix in the hive for survival. During mating, the drone’s genitalia (shown in picture) breaks off and is left in the queen and can be seen upon the queen’s return to the hive. This is called the mating sign. However, since she mates with many drones, each drones removes the previous drone’s mating sign and then mates with the queen.
The sperm from each drone is stored in the queen’s spermatheca so that she is able to lay fertile eggs for years to come from her initial mating flight. She will never mate again. A poorly mated queen may have stored only a limited amount of sperm and may only lay a very short time and turn into what we call a drone layer, laying only unfertilized eggs which produces drones.
It is very important that beekeepers see the value in replacing their queens on a regular basis. Replacing queens especially after June 21 can dramatically increase your hive’s winter survivability.
More on queens next time.
Summer Hours:
Mon – Thur 8:30 am – 4 pm Central Time
FRI-SAT visits & pickups by appointment only
Long Lane Honey Bee Farms
14556 N. 1020 E. Rd
Fairmount, IL 61841
(217) 427-2678 www.honeybeesonline.com
Email: david@honeybeesonline.com
The Bible says: “Eat honey, my son, for it is good; honey from the comb is sweet to your taste” (Proverbs 24:13).
Welcome to Long Lane Honey Bee Farm, a small bee farm of David & Sheri Burns, in central Illinois. Thank you for stopping by to learn something about honey bees. We are known not only for the hives that we build and sell, but for our online FREE beekeeping lessons. And our onsite beekeeping courses are becoming more and more popular. This year we’ve had students from close by, like Illinois and Indiana but we’ve also had students from Wisconsin, Minnesota, Michigan, Ohio, Virginia, Missouri, Tennessee and Louisiana.
There’s room for YOU! Here’s feedback from one of our recent students. I was interested in learning to keep honeybees but didn't know where to start. I came across Long Lane Honey Bee Farms website and after gathering some information there I signed up for one of their beginners class. David and Sheri are both great people to deal with, they put on an excellent class which helped me get a better understanding of what was involved in keeping bees. From the class room to being exposed to hives I felt as if I had made a great choice in selecting to take their class. I purchased a hive and nuc which I picked up on class day and upon returning home had the confidence and knowledge on how to set everything up. Thanks Dave and Sheri for making my startup a smooth success story and I look forward to taking your more advanced classes in the future. C. Anselment Mt. Vernon IL
We regularly receive calls from customers of larger beekeeping companies asking us for vital information to help them identify problems with their bees and equipment. While we want all beekeepers to be successful, we have a strong commitment to provide excellent support to our customers, most of which are like friends and family to us. And there is something to be said about support and loyalty. When customers purchase their beekeeping equipment from us, it helps us stay in business :) So, I want to thank all of our 2010 customers for your loyalty and support. We appreciate it so much! I realize that while many of you reading these lessons are currently keeping bees, still many of you are thinking about starting beekeeping in 2011! Good for you. Our classes are geared to help you get started or to be a refresher if you are already keeping bees. So check out our upcoming classes for July & August.
We’ve uploaded many new beekeeping videos. Our recent videos show how bees can clean up old, moldy comb, how to sweep bees off a frame with flowers, a mite on a drone pupae, how we remove bees from homes and more! Take a look now!
We’re not sure what your interest is in honey bees, but we are glad you stopped by for a minute to read what’s going on with bees.
One thing is certain. In my opinion, beekeeping is at its most challenging point in history which demands that beekeepers be as educated and equipped as possible. You don’t have to know it all, but at least take a class with us, walk in our bee yards, join us as we open up hives and let us show you hands on all about beekeeping. It’s worth the investment. LESSON 74: Swarming & Superseding: Keeping A Hive Queenright
There’s an old saying that goes like this, “A swarm in May is worth a load of hay. A swarm in June is worth a silver spoon. A swarm in July isn’t worth a fly”. Swarming is when a hive multiplies by over 1/2 of the colony leaving with the old queen, and a new queen takes over with the bees left behind.
Absconding is when all the bees leave, commonly seen when installing a new package of bees.
Are swarms worth retrieving? Some say no and some say yes. Some say no because of gas money and time spent chasing down swarms and retrieving them and you never know of the quality or the characteristics of the queen. Usually it is the old queen that leaves with the swarm, so you never know how old she is. Some go after all swarms no matter what because they are trying to build up their hive numbers. I see nothing wrong with retrieving swarms and I usually use them as starter hives for queen grafts. And I replace the queen with one of our own queens that we raise. So I like swarms as a way to obtain bulk bees. I have a rule of thumb that I will not drive beyond 40 miles for a swarm for two reasons: 1) It isn’t worth the time and gas money and 2) Often it is gone by time you arrive which is a double waste of time and money.
A healthy hive will swarm as a way of multiplying, making another colony. Generally, swarming for us here in Illinois lasts about a month, usually the month of May.
Here are common reasons why colonies swarm:
1) Congestion in the hive 2) Low pheromones from the queen 3) Bad weather followed by good weather When a hive is congested (no more room for the queen to lay or the foragers to store incoming pollen and nectar) and the nurse bees are unemployed, swarming is triggered. Once triggered, it may take weeks for the colony to finally swarm. The queen is too heavy and must be slimmed down for flight. Replacement queen cells must be built and the queen will lay in the cells so the bees left behind will have a new queen. The queen will stop laying. Scout bees begin looking for a suitable new location. Finally, once the replacement queen cells are capped, the hive will swarm. A little over half of the hive leaves and the rest stay behind to await the emergence of the new queen from her cell.
Small swarms can occur with the emergence of these new virgin queens. These are called afterswarms. As soon as the swarm leaves the hive they usually land quickly on a nearby tree. A good number of scout bees will each find a location. They return to the hive and dance with great excitement to win the vote, so their new location will be selected over and above the other scouts. This can take hours or days. Often when a swarm takes to the air a second time, they still may not have decided on one place and scouts will seek to win over the swarm as it is in the air.
Benefits Of Swarming
Since the Varroa Destructor mite wiped out the majority of feral hives, diversity in genetics are threatened. Thus, a swarm helps spread genetic diversity. And more swarms means a great number of colonies.
A Swarm Control Method?
When I began studying for the master beekeeping certification, I learned about the Demaree Method to prevent swarming. It frequently shows up on the tests and I’m glad I studied it, because it showed up on last year’s test. George Demaree was a beekeeper from Kentucky who came up with an effective method of swarm control which separates the queen from the brood. Examine all frames and destroy all queen cells. Place the queen below a queen excluder in the lower hive body and move all frames of uncapped brood to the upper hive body. The placement of sealed brood doesn’t matter and can be left in the lower or upper hive body.
Next, place an additional hive body full of drawn comb between the original hive bodies. full of empty combs between the original two brood chambers. In a week to ten days, you’ll need to destroy or harvest the queen cells that have been built in the upper hive bodies. Place a queen excluder on top of the bottom brood chamber before adding middle supers. In 7 to 10 days destroy any queen cells that have developed in the upper hive bodies.
The Demaree’s swarm control method came out in the last 1800s and is still an effective swarm control today.
Superseded Queens
It happens. Queens are replaced. We typically think that the old queen is just that, getting old, maybe unable to lay an acceptable brood pattern and the older bees have decided she needs replaced with some fresh blood. However, in recent years beekeepers throughout the US have seen an ever increasing occurrence of superseding.
We are left to wonder why. Some say the quality of queens are failing us. Others blame the weather, genetics, chemicals and on goes the list.
Sometimes I will observe a superseding queen cell in a hive with a very good laying queen. Every time I stop or prevent a superseding replacement, that hive never does well the following year and usually dies during the winter. I’ve learned to trust the bees when it comes to replacing queens. However, as a queen producer, I personally think the best practice is to replace the queen every year. Her pheromones are stronger, swarms are less and she lays best her first year.
We typically think of superseding as something as bad, but generally speaking it is good. Now, the hive will have a new queen. However, it does mean that the queen may perish while mating. About 4-6% of virgin queens do not make it back while on their mating flight. Then, it will be too late for the hive to raise a new queen because all larvae will be too old. In addition, you will also change the characteristic of your genetics as the new queen will mate with other drones.
Superseding cells are almost always found in the middle of the frame and only as one, not three or four. When your hive swarms or supersedes itself, one good thing is that it helps to break up the varroa mite’s own brood cycle. Mites reproduce in the sealed cells of bees, so when there is a break in the bee’s brood cycle due to a missing queen or a gap between queens, it reduces the mite’s reproductive cycle as well.
If you are not receiving these Lessons automatically, you can enter your email address below and have these sent FREE to your inbox.
Thank you so much for joining us for another lesson in beekeeping. We plan to produce shorter and more frequent lessons in the future. So stay tuned.
Here’s our contact info: PHONE: 217-427-2678 EMAIL: david@honeybeesonline.com ADDRESS: Long Lane Honey Bee Farms, 14556 N 1020E Rd, Fairmount, IL 61841
Until next time, remember to BEE-have yourself! David & Sheri Burns Long Lane Honey Bee Farms
Hello from Long Lane Honey Bee Farms and welcome to another beekeeping lesson! We are David & Sheri Burns and we are passionate about helping people become beekeepers. Here at Long Lane Honey Bee Farms, we love keeping bees, even though it can be a real challenge at times.
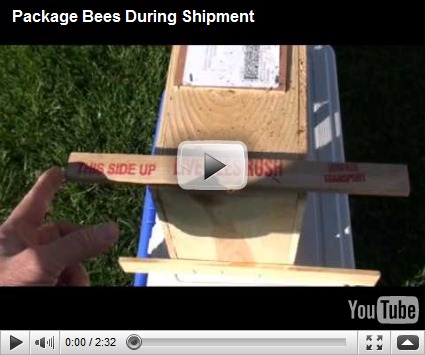
We can’t tell you how relieved we are that we got hundreds of packages shipped off! It took two postal trucks and 1 UPS trailer, but we did it!
Sheri and I babysat the UPS trailer until the driver hooked up to haul it away. Though it was a nice cool day, we hooked up a fan and blew air on the bees. We want our bees to reach the customer more than the customer does, so we went the extra mile. In fact, me and my daughter Karee missed a whole night’s sleep getting labels on and the boxes ready for shipment. Every year we tell ourselves we will never ship bees again, and we’ll only do local pick up. But we still ship year after year. It’s a bit treacherous shipping bees and so few of providers do it. Most prefer local pickup only but we realize so many live far way. We will ship if you also buy hives.
When I see pictures from our customers like young James full of excitement as a young beekeeper about to install his first package, it makes me want to ship bees again next year. Way to go James!
Our package bee pickup day was a huge success. We brought in hundreds of packages and customers from 8 different states arrive to pick up packages.
Enough about the past, let me tell you about what’s coming up soon, and then I’ll teach on how to build up a strong colony.
LESSON 73: HOW TO BUILD A STRONG COLONY
The success of your colony will depend mostly upon their overall strength. The stronger your hive is the less likely they will be to develop a disease or be overtaken by pests.
A new colony, whether it is a nuc or a package, can benefit from these 5 growth tips:
1) Feed the colony 1:1 sugar water & pollen patties.
2) Only give them more boxes of frames as they need.
3) Keep all frames tight together and keep the hive level.
4) Use beetle traps if you live in an area that has small hive beetles.
5) Every 14 days, inspect your hive and make sure there is a good brood pattern and that you can see eggs. If not, you must replace your queen immediately or the hive will not become strong and may even perish within 40 days. Let me give more details.
First, feed you hive. When they are new, they do not have any food inside the hive. They need pollen and honey. And most new colonies are placed on undrawn foundation, meaning they do not have any drawn out comb in which to place incoming nectar or for the queen to lay in. Feeding them 1:1 sugar water can assist the younger bees in producing wax and thus they will be able to draw out their combs faster. This is not essential because spring usually provides more than enough incoming nectar that feeding is not necessary. But, spring can also provide several days in a row of cool, rainy weather. Then, the bees can run out of food and fail to build comb. This is why many beekeepers experience a slow build up of their hives. Entrance feeders are what we recommend.
How long to feed? Anywhere from not at all to several weeks. Most people will feed their bees until they have down out comb in both deep hive bodies.
Division board or frame feeders are the second best feeders, pail and top feeders last. Top feeders have always been very problematic for beekeepers. They can crack, leak, mold and generally allow bees in the reservoir and die. We sell them though they are not our preferred type of feeder. You just can beat the long tested and used entrance feeder. So feed your bees.
Feed your bees pollen patties. They need pollen. There is always plenty of pollen in the spring. Last year some of our hives were pollen bound, meaning there was so much pollen in the comb that the queen ran out of room to lay. Again, if the weather is cool and rainy then they will lack pollen and not be able to build up their population as fast. So feed your bees pollen patties for about 1 month after installation. Remember, you usually do not have to, but if you really want to ensure they become strong, feed.
Secondly, keep your new colony tight. Do not give them too much space. For example, only give them 1 deep hive body to start with. If you give them two, it can discourage them from building comb. And, the extra space gives room for pests to hide and grow, pests like mice, small hive beetle and wax moths. But, if you keep the bees tight then they can better grow their hive and defend it against intruders. Wait until your deep hive body has 7 frames that are drawn out and full of bees then you can add the second hive body. Do the same before you place on the super above the second hive body too. I actually have a technique that works well for me. I install packages in a 5 frame nuc box, allow it to become completely filled, then transfer the frames over to a deep hive body. Bees work better when they are crowded. Will being crowded make them want to swarm? No, not a new set of bees. Bees are social insects which work better crowded. It is only when they become congested that they can swarm. Congested means they do not have any drawn comb for the queen to lay eggs in, or for the forages to bring in nectar or pollen. Congestion is not the same as being crowded. Crowd your new package but make sure they do not become congested.
3) Keep your frames tight together and your hive level. Bees are sensitive in how they draw comb on frames. If you leave too much space between frames, they will draw out odd shaped columns on the frame or they will build out a comb without attaching it to the foundation. So keep all frames tight against each other. Keep the hive level. Bees build comb straight down so if it is tilting slightly to the right or left, straight down will mean the comb will be slightly off the frame.
4) Use some sort of beetle trap to prevent the spread of small hive beetle. The best trap we’ve seen and one that we sell is the Better Beetle Blaster. We sell it with a syringe so you can easily fill it with your own vegetable oil. Watch our video below on how to use this trap.
Finally, you must inspect your hives every 14 days to ensure your queen is healthy and laying well. The queen lays about 2000 eggs a day. This allows the colony the ability to grow fast and have enough foragers to bring in lots of nectar. When you inspect, make sure you can see a good brood pattern and eggs. If the pattern of brood is spotty or looks to be drone brood only, replace the queen immediately. We raise our own queens and sell them all around the US. Please call us if you need a new queen. 217-427-2678
We are working on another fun-filled Studio Bee Live podcast, so keep an eye out. We have a new hive that we cannot keep in stock. It is a beautiful 8 Frame garden hive. We have these for sale now, so order yours today! Please allow 14 days for shipment. CLICK HERE FOR MORE INFORMATION ON OUR GARDEN HIVES.
If you need beekeeping hives or other equipment, remember we always appreciate your business! Here’s how you can contact us:
WEBSITE: www.honeybeesonline.com Email: david@honeybeesonline.com Phone: 217-427-2678
Hello from David & Sheri Burns at Long Lane Honey Bee Farms.
Today, we’ll continue our look into the biology of the honey bee as we examine the bee’s antenna and we’ll talk about how another harsh winter has taught us more about successfully overwintering hives. Remember, if you have trouble viewing photos or videos in this message sent to your Email, you can always go to our actual posting of these lessons and view them there: www.basicbeekeeping.blogspot.com
Please tell others about these free lessons. They (or you) can sign up and have these sent to your Email FREE.
Before we begin, let me tell you what we’ve been up to. This is the time of year when everything is running at full speed. In the winter April seems so far away. Then, suddenly we wonder where the time went, because we are only three weeks away from package bee pickups! And only 4 weeks away from when our first shipment of packages ship out.
For my 50th birthday, all my children went together and bought me an HD video camera and I’ve had a blast video taping bees! And it takes beautiful close ups too. Here’s a bee working hard to bring in pollen. She’s flying in hovering for a good spot to land. If you click on the photo for a larger view you can see the pollen in her back legs. Here in central Illinois the bees started bringing in pollen around the middle of March. Maple trees and other trees are starting to produce for the bees.
I placed a video on YOUTUBE of bees collecting nectar and pollen from my maple trees. Which brings me to a point I’d like to make. I need your help. We are always seeking ways to promote beekeeping and one of the ways we are doing this is through YOUTUBE videos. Here’s how you can help. Sign up for our YOUTUBE Beekeeping channel. Just go to www.youtube.com/longlanehoney and sign up for our video subscriptions. It’s free. But more importantly, if you can view our videos then give them a high rating, it will push our videos higher up on the search engines on YouTube. That would be a big help and you’ll benefit from learning through our videos. Thanks!
Here’s an example of our Beekeeping Video channel. Our most recent video demonstrates how to check your hive for sealed brood, eggs and larva.
And I also want to include a picture below to help you identify eggs in the cell. Click on the image to see the larger image. When you inspect a hive, you do not have to see the queen as long as you see 1 day old eggs. Here’s what they look like. You may need reading glasses or a magnifying glass to see them, but most people can see them with the naked eye. Notice the eggs, pollen, larva and sealed brood. I took this photo to help you become familiar with what to look for in the hive. Before we get into our lesson today, I want to show you a beautiful hive that we are now carrying. Customers have always made special request and a frequent special order is for 8 frame hives, instead of 10. Everything is the same, but the hive is a bit more narrow, and of course each box contains two less frames. Recent studies show that 8 frame hives do slightly better than 10 frames. Probably not enough to switch over, but a slight advantage because bees prefer to build up and down over sideways. So now we are making 8-Frame equipment regularly. Here’s a beautiful 8 frame set up we are selling with a pure copper top. It’s called a Copper Top Garden Hive. We have two of these available, so you must call in to purchase. 217-427-2678.
LESSON 72: The Antenna of the Honey Bee and Overwintering Success
Winter-Bee-Kind For Winter Feed For Bees
In The summer of 2011 we introduced our Winter-Bee-Kind after several years of studying overwintering hives. We could barely keep up with production they were in such demand. We still make them right here at Long Lane Honey Bee Farms but we've expanded our production methods to keep up with demand. So many beekeepers told us that these were the only thing that got their hives through the winter. This year, it's time for the 2014 production year. We even mix the sugar and pollen and right here and pour the candy into the Winter-Bee-Kinds. WHAT IS A WINTER-BEE-KIND? It is a one piece candy board that provides food, ventilation, upper insulation and an upper exit/entrance to help bees remain healthier during the winter. Someone said it insulates, ventilates and feed-i-lates. With the built in upper vent, you don't have to worry about snow covering up your hive's lower entrance. The bees can still go in and out through the top vent spacing. We avoid shipping Winter-Bee-Kinds in hot weather and start shipping each September-March. You can place our Winter-Bee-Kinds on your hive anytime, even in the winter. Because it goes on top of the hive in place of the inner cover, and you are NOT removing any frames, it can be placed on the hive in cold weather. Just do it fast. Open the top, remove the inner cover and place the candy side down and the vent slot toward the front of the hive and you're done. Click here to order your Winter-Bee-Kinds Some form of a candy board has been around for a long time. Beekeepers of long ago placed candy in their hives to provide enough food for their bees to survive the long months of winter. There are various mixtures and receipts for candy boards. Some are made with soft candy and some with hard candy. The end result is still the same. The bees will consume the sugar as they need it. We've always been concerned about the amount of condensation that can develop in the hive during the winter. The bees produce heat within their hive and as the temperature is very cold outside the hive, condensation will develop on the warm side, just above the bees on the inner cover or top cover. This condensation can accumulate and drop down onto the winter cluster of bees below. Bees can stay warm in the winter but they must remain dry. If this cold water drips down onto the bees, it can reduce their ability to keep their cluster warm. The insulation on our Winter-Bee-Kind helps reduce the excessive moisture and even puts some of that moisture to work, as it accumulates on the candy and makes it easy for the bees to consume the sugar. Thus, a Winter-Bee-Kind can help lessen two winter stresses, the lack of food and excessive moisture. We make our Winter-Bee-Kinds with sugar and a healthy amount of pollen powder. Many beekeepers make the mistake of only feeding their bees sugar in the winter, but the bees also need protein which they obtain from pollen. Our Winter-Bee-Kinds come with pollen mixed in with the sugar.. Click here to order your Winter-Bee-Kind today. We recommend that you place candy boards on your hive any time between Oct-March.
Commonly Asked Questions
Q: Which way does the candy face in the hive?
A: The candy faces down just above the winter cluster. Normally, this means that the Winter-Bee-Kind would be placed on the brood box that contains the cluster. For example, if you overwinter your bees in a single deep hive body, the Winter-Bee-Kind would be placed on this deep hive body with the candy facing down toward the cluster. If you are using two deep hive bodies to overwinter, then the Winter-Bee-Kind would be placed on the top deep hive body. It is best to disregard the use of an inner cover, and simply place your top cover over the Winter-Bee-Kind.
Q: What about winter moisture?
A: Moisture can develop in the winter from condensation, a contrast of the heat the bees produce in the hive and the extreme cold temperature outside the hive. Condensation accumulates on the warm side, which means moistures collects on the inner cover or top cover above the hive. This can drip down on the bees and chill them during the winter. A Winter-Bee-Kind takes the place of an inner cover and any moisture that develops from condensation aids the bees in consuming the candy.
Q: How long will a Winter-Bee-Kind last on a hive?
A: On average about 3 weeks. However, a colony that has ample stored honey may not consume the candy board as fast or not at all until they need it. A colony close to starvation may consume a Winter-Bee-Kind within a week or two.
Q: Since Winter-Bee-Kinds are placed or replaced on the hive in the winter, can I open the hive up on a cold day?
A: It is best to place the candy boards on a hive when the temperature is above freezing and try to place the candy board on and have the hive sealed back up within 1-2 minutes. It should not take over 1 minute. Do not remove any frames in cold temperatures, only place your Winter-Bee-Kind on and off quickly. If you can choose the warmest day during the winter, that would be best. Try to avoid very cold, windy or rainy days.
Q: How do I refill a candy board?
A: It is best to send back your candy board and we will refill it for $7 plus shipping. If you are a good candy maker, you can do it yourself.
Q: How do I get one with a pollen?
A: Our Winter-Bee-Kinds contain pollen as well.
Q: Can I make my own?
A: You can, but you must experiment, because you do not want the candy to be too hard or too runny. The exact mix depends on your altitude, heat source and other conditions so it will be different from one location to another.
Q: Why was some liquid sugar dripping out of my Winter-Bee-Kind when I received it?
A: It is the nature of candy boards to be a bit on the dripping side even though the top may be hard. Do not be concerned if you see liquid sugar dripping out of your boards when you receive it. It usually means it was left on end during shipment for a prolong period of time. The bees will clean everything up and enjoy this soft liquid.
Q: How much sugar is in one Winter-Bee-Kind?
A: Approximately 5 pounds
Q: When do I put a Winter-Bee-Kind on my hive?
A: Any time! Nov, Dec, Jan, Feb are good months to place on the boards.
Q How often should I check my Winter-Bee-Kind?
A: Every three weeks, take a peek.
Q: Do you make Winter-Bee-Kind for 5 frame nucs or 8 frame hives?
A: Yes, check out our website to order, but carefully read the description to make sure you are ordering the correct size and type.
Q: Can the candy break loose from the board on the hive?
A: It rarely happens, but during extreme winter weather, the candy and separate from the board while on the hive. This is not a problem. The bees will continue to consume the sugar.
Q: When I place it on the hive, do I use my inner cover. Just how does it go on?
A: Winter-Bee-Kind takes the place of your inner cover. Simply place the Winter-Bee-Kind on the top of your upper hive body or super with the candy facing down, then place your top cover on top of the Winter-Bee-Kind. Be sure to use a rock or brick to make sure the wind does not blow your top cover off. There is overwhelming enthusiasm about our Winter-Bee-Kinds. Click here to order now.
First, let’s address overwintering of bees. Let’s face it…it ain’t easy getting bees through the winter. Get this into your head. Bees laugh at cold! Healthy bees have no trouble at all in the coldest of climates. They can and do survive the cold. But, if they have other stressors, like thracheal or varroa mites or a disease or lack of nutrition, they will struggle or perish in the winter.
Our approach, here in Central Illinois, is simple. 1) Adequate ventilation (open screen bottom boards) 2) Good food storage going into winter 3) Our proven queens that are winter hardy, 4) Reduce front entrance to keep mice out and 5) Some sort of wind block that is a couple feet away from the hive. To make my point, here’s one of our customers/students giving a play by play report of how he followed our advice and got his hives through a Kansas winter. Before I share his testimony, I want to make an observation about his photo. Notice how the grass is green around the black paper under his hive? Grass greens up faster the warmer it is. I suspect the black paper under and around the hive assisted the overall “heat” of the hive and probably was a good thing. I’ll let Brian tell you the rest because his approach proves that it works! Brian says… “Last fall I knew that I did not know what I should do to help my bee’s make it through the winter. This is my first hive and was the first winter that I was going to try to take my bees through as a beekeeper. Dave and Sheri both were very helpful with any questions that I had, plus I read and re-read all the lessons that they most graciously provide us for free. I also went to my local book store and bought three bee books to increase my knowledge of my new found bee hobby. What I did to prepare my bee hive to support my bees as best as I could, was to put up a small wind break with a cheap tarp a couple of feet away on the north side of the hive to block the north wind. I left the screened bottom board installed on the hive, as recommended by Dave and Sheri. Then I took two wooden pencils and broke them in half. I put one piece of the pencils in each corner on top of the inner cover, as I learned from one of the books that about one quarter to three eights of an inch between the inner and outer covers would help prevent condensation by improved ventilation. I then placed the outer cover back in-place on top of the inner cover. I installed the metal entrance reducer to keep mice out of the hive. Walla, my winter preparation was complete. What I learned through reading Dave and Sheri’s lessons, and confirmed through the books that I bought, was make sure that the bees had proper ventilation to prevent condensation within the hive, because condensation is a bee killer when it builds up and drips onto the colony, and is one of the major reasons a healthy hive will die out during the winter. I left one honey super installed, that was probably 70 to 80 percent full of honey for the bees just incase. I also did not take any honey from them last summer since it was their first year, and I was afraid that they would need the food during the winter to remain strong. I did not try to arrange frames in any order within the hive, since I do not understand that process. When the bees were no longer foraging for food because there was nothing for them to forage, I put the feeder out for them with 2 parts sugar to1 part water on the warm days. Basically any day that the weather forecast said a high of about 50 degrees. What I found out from trial was that my bees did not eat the sugar water unless the temp hit 45 to 50 degrees with calm winds, and they were more active when it was sunny. We, as most, had a pretty wet and snowy winter. I have lived in Kansas for the last 25 years and this was the most snow that I can remember having. Each time it snowed, I would go out to the hive and brush the snow away from the bottom of the hive on all sides. I also removed the snow from around the pallet that my hive sits on to help increase the airflow through the bottom board. I also made sure the entrance reducer was cleared of snow so the bees could come and go through the bottom of the hive. At the end of January I opened my hive for the first time since early November, to see how the bees were doing. To my surprise, I found they were doing fine and had moved up into the top brood box, I could not see any moisture in the hive, and I was happily surprised at the amount of bees I could see, however initially I was concerned at the amount of dead bees I cleaned out from the bottom board with a stick. I have since opened my hive briefly two other times, once to put a pollen patty on and once to see if they had eaten the pollen patty. So far they have not touched the pollen patty and I don’t if that’s because they don’t need it or it they just don’t like processed foods. In conclusion, with a little help from me and some great lessons from Dave and Sheri I have to give 90 percent of the credit to my lovely queen and her worker bee lineage, provided to me by Lone Lane Honey Bee Farms, because lets face it, I stayed inside where it was warm. Thank you Dave and Sheri, I think I’m hooked.
Way to go Brian! Brian’s insight I know will help so many others in the fall as we prepare for winter. But remember what I say…Winter preparation starts in the spring by keeping your bees healthy all year!
THE BEE’S ANTENNA
When I was young, back in the 60s, my parents bought me a set of Radio Shack walkie-talkies for Christmas. My brother and I had a blast with those. We pretended we were astronauts, spies, and soldiers. Back then, they barely carried across the street even with an antenna that I remember being about 4 feet long. I remember I was terribly heartbroken when I went to retract my antenna in a hurry and it bent and broke. We tried to tape it and solder it, but it was done. That was my first experience with an antenna.
We still use antennas for communication. Even the satellite dish for our t.v. is technically receiving a signal from outer space. Bees also use their antennae to communicate and gather data about their environment around them.
Where do honey bees spend a large amount of their time? In the hive, in a dark hive. Therefore they use their antennae for taste, smell and touch. They have one antenna on each side of their head. It is connected to the brain through a large nerve, a double nerve that transfers all data received. The antenna moves freely as it is set in a socket. This allows the bees to manipulate their antennae freely. Each antenna is full of tiny hairs, nodules and other sensory organs. While it is true that bees do not have ears like we do to hear, they use their antennae to hear. Actually tiny hairs on the antennae can detect tiny movements in the air caused by vibration. As you can see in the photo above (click for a larger image) the antenna is made up of segments, 12 in worker bees and 13 on drones.
It is not uncommon to see bees rubbing their antennae together to communicate, feed and share information. Honey bees are known to trap and encase other invaders in the hive, such as the small hive beetle. They will build a propolis jail house around a small hive beetle. However, the beetle uses its antennae to trick the bee into feeding it.Here’s a bee on my finger cleaning her legs and antenna.
Okay, for all of you who are waiting for a chance to receive something free…who doesn’t like free! Call in on Monday morning starting at 9am sharp Central Time. for two free Beetle Blasters. These are neat little traps for small hive beetles. First 3 callers are winners. Every beekeeper should have one or two of these in their hive just in case that beetle shows up. You fill it have full with vegetable oil and place it in the deep hive body between two frames. The beetle likes dark places and will run down into the oil and die. First three callers get two each. Call 217-427-2678. 9am sharp Central Time. Good luck.
Thanks for joining us today for another informative and entertaining talk about honey bees. Be sure to check out our Studio Bee Live Podcasts too: www.honeybeesonline.com/studiobeelive.html
And remember to please view and rate our Beekeeping videos.
We are looking for someone who is somewhat musically talented to work up a little song that we can play when you log on to our website, something to do with bees of course. If you’ve got a band or group, give it a shot!
Here’s our contact information:
David & Sheri Burns
Long Lane Honey Bee Farms
14556 North 1020 East Rd.
Fairmount, IL 61841
217-427-2678
WEBSITE: www.honeybeesonline.com
YOUTUBE: www.youtube.com/longlanehoney
TWITTER: www.twitter.com/longlanehoney
This is David & Sheri Burns reminding you to BEE-have yourself!
Hello from David & Sheri Burns from Long Lane Honey Bee Farms. We saw that some may have had trouble seeing this lesson if it was posted via your Email, so we are attempting a duplicate resending, hopefully working this time. Thanks for your patience.
We’ve had some hints that spring is getting closer. Bees are out flying a bit more, and warmer weather! Finally, as it has been another long winter.
In today’s lesson I want to once again teach on the biology of the honey bees as we take a look at the fascinating leg of a bee. Before our lesson, let me ramble on a bit.
Let me tell you that I have some neat videos I’ve taken of our hives this winter. So, be sure and read through all my ramblings so you can see what one of our queens can do taking her gang through a terrible Illinois winter. And if you have trouble viewing the videos because you received this via your Email, go directly to where these lessons are posted: http://basicbeekeeping.blogspot.com
Many (and I do mean many) people desire to visit our honey bee operation. In fact, already people are showing up to tour our place. Some have asked to go out and work the bees with us. Please understand that we certainly welcome tours, but it is seasonal. Hives cannot be opened and regularly inspected until it is around 60 degrees on a regular basis.
During the spring our operation is buzzing! Grass is green, trees are leafed out, and we are in full operation. Until May 1st, however, our place is not tour friendly. The grass is brown, trees are bare, everything is wet and muddy, bees are tightly clustered, sticks are in the yard…winter has left its mark.
So Sheri and I sat down and discussed how we could better prepare for those who wish to walk around (take a tour) and ask a bunch of bee questions. After all, that’s our goal, to help more people get into beekeeping. Please understand that we offer an array of various beekeeping courses and classes. This is how we educate those who want hands on experience learning to work bees. But if you MUST take a tour read on...
TOURS
We have 3 levels of tours we offer from May 1 through Sept. 1 Friendly Farmer Tour
This tour is available Monday – Saturday any time between 1pm – 4pm. The Friendly Farmer means you can talk to us while we work, and you’ll get to see what we do. It might be grafting queens, painting or building hives, packaging hives from shipment, working hives or mowing grass. In other words, feel free to come, but we must keep working and we’ll talk while we work. We cannot stop what we are doing to show you something else. For that, see our other tours below. Wear your work clothes and bring a hat and veil. If you come unannouced, we might be speaking in a different state and you'll not be able to tour our place, so call first. COST: FREE David and Sheri’s Vacation Money Tour
This tour is available by appointment only on Saturday. Cost $100 whether it is one person or 100. In other words, a group of 30 people still only pay a total of of $100. The reason for the name is because money paid for this tour goes to our vacation fund. On this tour David or Sheri will take you around the operation and show you how everything works. It is a one hour tour and questions are answered during the tour. If you’d like to see a particular aspect of our operation, we just ask that you let us know when you schedule your tour. COST: $100
Call 217-427-2678 to arrange your appointment. David’s Brain Picking Tour
This tour is available by appointment only on Monday, Wednesday and Saturday. COST $200 This is a 2 hour tour where David will show you all aspects of beekeeping, raising queens, harvesting honey and more. For 2 hours you can pick David’s brain and he will rattle off whatever comes into his mind at the moment. The cost covers 1-5 people.
Again, all tours do not start until May 1. If you wish to purchase beekeeping equipment, packages, nucs or supplies while you are here, be sure to let us know in advance so we can have everything ready when you arrive. Call 217-427-2678 to arrange your appointment
LESSON 71: Amazing Leg of the Bee & What to Expect from Your Overwintered Hive The honey bee has 6 legs, three on each side. Bees use their legs like we do, to walk and run. However, there is more to the bee’s leg than just movement. On the very end of the leg is what we might call a foot. The foot is made up of three claws. This enables the bee to cling and grip on to things.
It gets more interesting. On the front leg, called forelegs there are antennae cleaners. All three caste of honey bees (workers, queens and drones) have this special cleaner device. Since the antennae serves an important role in communication it must be kept clean. You can look at bees up-close and usually see them cleaning their antenna.
The front legs also have stiff hairs which the bee uses to clean their head, eyes and mouth and to gather and transfer pollen to the back legs which have the pollen baskets.
The middle legs have hairs or brushes which are used to clean the middle of the bee, her thorax. The bee’s middle legs are also used to continue transferring the pollen to the back legs. The middle leg also has a spur for to pick the wax that is produced on the abdomen. The middle legs are also used by the bees to clean the wings and to dislodge the pollen from the baskets on the back legs.
The back legs are most well known for their pollen baskets. These “baskets” aren’t actually baskets, but hairs that surround bare spots on the leg. So the hairs hold the collected pollen which is placed on the back leg. Often, nectar is added to the pollen to make it stay tightly together. Only the work is equipped with these rear leg pollen baskets. Propolis is a stick substance which the bees gather from tree sap and sticky plants and the bees also carry the propolis back to the hive in their pollen baskets.
As expected the honey bees is magnificently made and every part has many purposes. What to Expect from Your Overwintered Hive
Many beekeepers are finding that as it warms up, they are peaking into their hives to see if there are still bees alive.
Newer beekeepers are sometimes alarmed by what they find, things like dead bees…lots of dead bees. Even hives that survived the winter and are alive still may be filled with dead bees, certainly on the bottom board but sometimes even between frames.
Often time in the winter the bees break cluster to gather honey from frames that are beyond reach of the cluster. But when the temperature drops, they sometimes fail to regroup as one cluster, and instead form two or more smaller clusters. These smaller clusters cannot generate the heat needed to stay alive, so the smaller clusters die and usually freeze within the hive.
If your bees died with their heads stuck in the bottom of cells, this usually means they starved to death. They died licking the last drop of food from the bottom of cells.
It is very common for the bottom board to be full of dead bees. They either died of old age or winter kill. Left alone, the bees will eventually clean out the dead. However, I like to remove the bottom board and shake out all the dead bees. This keeps a cleaner hive and makes life easier for the bees.
Mold and dampness. It is common for beekeepers to find dead and moldy bees in frames too. This means that your hive had too much moisture over the winter and that you needed better ventilation. Every winter, in our yards, the hives that do best are the ones with opened screen bottom boards, drafty holes and propped lids.
What to do about moldy dead bees in a hive. Shake them out or rub them out, at least as many as you can. You can’t get them all out. They are dead, they won’t sting you. Be careful not to break the comb if you try knocking out the dead bees. Typically, we don’t worry about the mold unless it is really thick. A slight glaze of green or white mold doesn’t worry us. We reuse the frame and let the next package clean it up. Dead bees stink bad! Sometimes beekeepers ask me if they have American Foul Brood since there is such a stink in the hive. But I remind them that there is little to no brood in the winter to smell. The smell is the dead bees.
If you forgot to seal off your entrance to keep mice out, you may find some fury friends in the hive, and even a sizable mouse nest with little baby mice. If so, serve the eviction papers and throw all the mice overboard.
You might also notice bee poop all over the top and sides of your hives. It’s a light to dark brown and thick almost waxy substance. Do not panic and conclude you have Nosema. What you are seeing is that the bees have finally had a chance to defecate outside the hive and they didn’t bother to fly away very far. You wouldn’t either if you’ve spent 4 weeks waiting for a bathroom break. Excessive spotting might happen on some of your hives and not others. Don’t worry, it will clear up with additional warm days. In the slow motion video below you can see my bees have messed on the front of their hive. This was taken on March 4, 2010. If you have trouble watching the videos in your Email, go to our website at: http://basicbeekeeping.blogspot.com and you can watch the video there.
Now, if all went well with your bees over winter, then this is what you’ll see in the video below. Lots of bees, and a queen and lots of stored honey still available. This is an example of the queens that we produce. We graft from hives with strong winter hardiness and good honey producers and very gentle bees. They also show hygienic behavior which means they are more mite resistant. Again, if you have trouble watching the videos in your Email, go to our website at: http://basicbeekeeping.blogspot.com and you can watch the video there. Notice how gentle our bees are even at 40 (f) degrees! No gloves. These hives are as strong coming out of winter as most beekeeper’s hives are in the summer. Our candy boards that we sell also help absorb winter moisture.
Let’s have even more fun. Here’s a video I’ve made into slow motion of bees flying into their hive.
Beekeeping techniques that we teach at our beekeeping classes will help beekeepers have the success in overwinter hives like we do as well. And of course, having the right queen helps, like our Pioneer Queens. In fact, here’s another video of our Pioneer Queen and her overwinter gang. Notice how many bees there are and how much honey they’ve stored for the winter and the key is…how little they have eaten to survive the winter. Watch this…
Before I finish today I do want to let everyone know that we have set aside a large number of packages for customers who also purchase hives from us. In other words, if you want a hive and bees, we have that combination available. Other wise, if you need just bees, we are all sold out. But you can get bees from us if you wish to also purchase a hive.
Here’s the info on our upcoming beekeeping classes:
e limited.Until next time, remember to behave yourself!
David & Sheri Burns
Long Lane Honey Bee Farms
14556 N 1020 E. Rd
Fairmount, IL 61841
Phone: 217-427-2678
Website: www.honeybeesonline.com
FREE ONLINE LESSONS: www.basicbeekeeping.blogspot.com

 No one guessed our mystery photo on our last lesson. From left to right, a jar of sweet tea, a jar of honey with comb, and a jar of pickled eggs.
 Speaking of Dr. Collison, he heads up the Eastern Apicultural Society’s Master Beekeeper program which I will be attending next month in Boone, North Carolina to go through my second year of testing. Several from our family will be going over for the whole week for the EAS beekeeping conference. The master beekeeping program consumes the last two days of the conference. If you can afford the time away, I would strongly encourage you to come and enjoy the conference. Outstanding speakers and workshops.
 It is absolutely the most superbly orchestrated beekeeping conference, ever! If you can’t come every day, you can chose the latter part of the week. It’s a blast. I hope to see you there. I’ll be wearing the yellow “Long Lane Honey Bee Farms” shirt like the one in the picture. For more information on the EAS conference Click Here.
 2) Do not leave a frame out of a hive. Always put the frames back! If you don’t, you are guilty of violating bee space. The bees will nicely fill the vacant frame space with comb that you’ll never be able to work with.
 3) Do not use a bee vac in the afternoon when the foragers are returning from their flights. The suction will pull out the honey from their honey stomachs and drown all the other bees in the vac.
 5) Don’t use old equipment. American Foul Brood spores can live dormant in abandon hives and stored equipment for nearly 80 years and activate once you start using the frames or boxes.
  7) Don’t be caught without something to put a swarm in. Keep a spare hive on hand. As more people learn that you’re a beekeeper, you will receive calls to retrieve swarms. Be prepared.
 19) Don’t take your chances with an old queen. Requeen every year or two. A younger queen’s pheromones will reduce swarming and she will lay more prolific.