Before our next lesson on the importance of having an observation hive, I want to show you how we removed a hive from a house last Friday.
As more and more people learn that you are a beekeeper, you'll eventually be asked to remove a swarm from a tree or a hive from a house.
This is a great promotional opportunity for honey bees and a great occasion for you to educate bystanders about the important role honey bees play in our survival. And you'll probably get a front page spot in the local newspaper like we did. Front Page Paris Beacon News Article Online
Removing a hive from an existing structure requires much work. Shaking a swarm from a branch is easy compared to removing a full grown hive from a structure, having to tear out walls and remove every bee including the queen.
Last Friday, with the help of my father-in-law, Bill Henness, we removed a hive from a house. I want to share the step by step process with you so that you can tackle these removals with confidence.
First, we have the owner sign a release form giving us permission to remove the hive and for them to repair any damage.
Next, we gather up essential tools for the job. This is critical.
Having done my share of these removals, I have found that several tools are essential for me, but you may not need them all. Minimally you will need a smoker, a bee suit, gloves and tools to remove whatever is covering the bees. But, for me to get the job done, I use a bee vac, an alternate power source such as a auto inverter or a generator to run my saws and bee vac, a saws-all, a good bee suit, containers for the brood and honey not to mention demolition equipment such as crow bars, hammers, ladders etc.
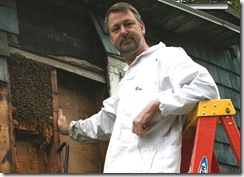
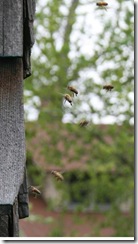 Here's the entry point of hive at the corner of the house. You can click on the pictures to enlarge the photos. This is a courageous undertaking. It is not for the weak or timid. It is very tedious and time consuming because when you first start all you see is where the bees are going in. You don't know if they are going up or down or sideways. You really can't listen to the wall and determine much either because of the way sound travels through wood. So you just have to cowboy up and start tearing away either the inside or outside wall. We prefer to do it all from the outside. It makes too much of a mess from the inside. The house will smell like smoke and you'll track honey and propolis in the house too. So do it from the outside when possible.
 Next, we started by removing the outside siding to expose the comb. In this picture we were fortunate enough to venture a good guess at where the hive was and you can see a new section of brood comb freshly made just below the existing section of older comb with brood intact. Notice the crowbar as Bill pries off another piece of wood siding. It's impossible to be gentle or quiet in this sort of work, so suit up well! Although the above picture makes it look easy because other than the two bees on his back, there are no bees on the comb.
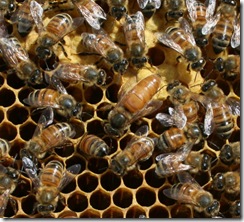
 That's because with the bee vacs we sell and use, we safely vacuumed them into their holding cage. Here is what it looks like before we used the vac. Trust me, without a bee vac, it is almost impossible to herd 80,000 away from their home.
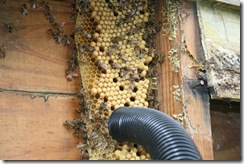
With the bee vac, we can clean off all the bees and then remove the comb. It is very tedious because you just have to peel away sections at a time, carefully search for the queen while vacuuming.
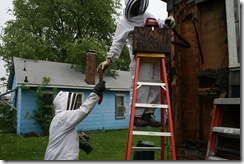
Piece by piece pieces of the comb are handed down, brood comb placed in one container and honey in another. I carefully inspect for any diseases such as heavy mite infestation, American Foul Brood, Small Hive Beetle or other noticeable problems.
 Like most hives the honey is store far away from the opening. I started at the bottom, now I'm about four feet from the top and finally I've reached the honey frames protected by the bees which are on the comb in the picture, soon to be vacuumed safely into their transportation cage.
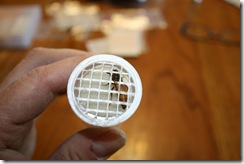
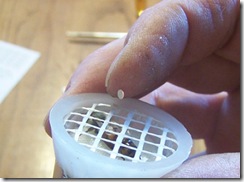
 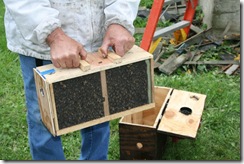 In fact, this was our second cage and look at all the bees! It takes two hands to hold this package! Bill makes our bee vac with a special "secret" so that hardly no bees are killed by being vacuumed into their cage within the bee vac's outer box. This "secret" is visible in the picture, but if I told you he would have to kill me :) But I was impressed that I noticed only about a handful of dead bees several days when I inspected them in their new hive. Way to go Bill!
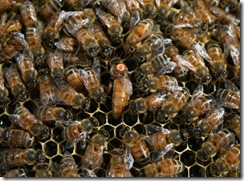
Here's a new bee, about to emerge from her cell and wondering what all the morning racket is all about! Workers are not helped out of their cages like drones are. Instead, they must wiggle and climb their way out all on their own and then they have to clean their own cell.
 That's a lot of brood foundation. This was a pretty large colony.
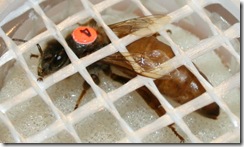
Sometimes we take the brood and place it into our own frames and then place it into the hive. This is essential if you cannot be sure the queen is save with the bees.
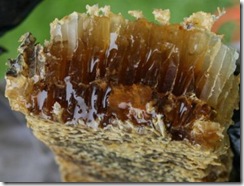 Of course, the treat of raw honey is wonderful, and you never know how many pounds of honey you'll get from a job like this. But, not as much during early spring because the bees consumed most of it during the winter and have not yet had time to replenish their supply.
 Finally, the job is done, the bees are safely caged away and the space between the studs is clear of comb and bees. My father-in-law sprays some soapy water to keep the stray bees from coming back or another swarm to decide to move in.
So, get ready beekeepers! It's up to you to help save honey bees rather than have them destroyed. Go get 'em. Just make sure you have some spare hives sitting around so that you can put these captured swarms and hives into a new home. If you don't have a spare hive, call us today and place your order, or order a bee vac before you get your first call! 217-427-2678.
Our next lesson will address the need for all beekeepers need to have an observation hive. I believe it is essential for your success and I'll tell you why, and how to keep one going.
For now, this is David & Sheri Burns thanking you for joining us today and remember, BEE-Have Yourself!
David & Sheri Burns
Long Lane Honey Bee Farms
217-427-2678
Email: david@honeybeesonline.com
WEBSITE: www.honeybeesonline.com

