Okay, I really do intend on completing the lesson on the observation hive, but it will be delayed a few more weeks while I test and retrieve some vital information. And we are building a store which will house our large observation hive, so I want to wait until we have that up and operational to include in the lesson.
We have been EXTREMELY busy filling orders and building hives. It has been so good to have heard back from so many of our customers who are thoroughly enjoying keeping bees.
In today's lesson, I want to share about raising queens. I used to think raising queens was a monumental undertaking left to the more experienced beekeeper, commercial beekeepers or queen breeders. However, it is good for every beekeeper to know how to raise a queen, if in no other way, simply by placing a frame of eggs in a queenless hive and having them raise their own queen. That's queen rearing in the simplest way. Beekeepers need queens. They are in big demand and in short supply. There is a mystery that surrounds the queen, and most beekeepers are content never to handle her or monitor her performance. But the more we observe and know our queens, the better we are in control of the overall survivability of our colonies.
Also, by raising our own queens, we control much of the characteristics of our hives. Meaning, that we should choose to graft from the hive that has the overall most favorable characteristics such as:
1. Gentleness
2. Good brood pattern
3. Rapid spring build up
4. Resistance toward pests and disease
5. Minimal swarming
6. Good honey production
Once a good hive is selected, there are several ways to raise a queen. Some use a kit which makes gathering the eggs or larvae easy and requires no grafting. However, these kits can be somewhat restrictive in timing, whereas actual grafting of the young larvae provides much more flexibility.
Our operation has studied queen rearing for several years. In the last two years we have had more and more success understand queen rearing. To help us along, my wife and I have attended several workshops and conferences on queen rearing. At one of these conferences I had the pleasure to hear from Dr. Joe Latshaw of Latshaw Apiaries. www.latshawapiaries.com
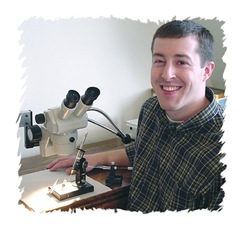 Months after the conference I emailed Joe and I found him very helpful in answering some of my questions. Then, after talking with Joe on the phone, he offered to personally mentor my daughter, Karee, and me in queen rearing. So a couple of weeks ago my 14 year old son, Seth and my 17 year old daughter made our way to Ohio to meet with Joe. What a great day of education it was!
Joe's specialty is producing inseminated breeder queens. Commercial beekeepers purchase inseminated queens from Latshaw Apiaries and then raise their own queens from this queen because her genetics are more controlled through insemination. Joe is also the state coordinator for the Ohio State Beekeepers Association queen project which is called the Ohio Queen Project (OQP). It is a program designed to promote queen rearing through training and working with local beekeepers. In addition, the OQP is also a stock improvement program aimed at developing a regionally developed stock and then promote this stock through the production of locally produced open mated queens.
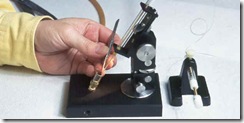 One more thing about Joe. He also invented and designed a very unique, flexible and easy to use, award winning insemination instrument which he sells.
I have a dream...of one day breeding a queen from Illinois (Midwest) survival stock which is more accustomed to the climate, conditions and pests in the upper US. I hope that all of my work and research that I am doing now will lead to that end, if not for others, at least for my own operation.
So, Joe took us out into his bee yards and explain the whole process of queen rearing. I've heard about the difficulties in grafting and so I started queen rearing using a particular system that requires no grafting. But after talking to Joe, he explained the benefits of grafting and I was sold.
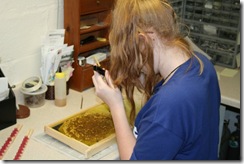 Grafting means that you examine a frame of brood from your selected hive. Then you look for 1 or 2 day old larvae. This is an important step. Here's, my daughter Karee gaining experience in grafting very young larvae from a frame of brood. The younger the larvae, the better. I try to find the youngest larvae that has just barely started to curve on the bottom of the cell. They are harder to graft, but have a much more promising success rate. This is known as grafting, taking eggs or young larvae from a frame of brood and transferring it into the queen cell cups.
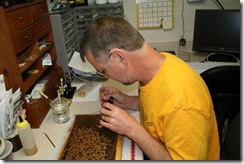
I took a shot a learning too and it really was not as difficult as I thought. I need lots more practice, but I'm looking forward to becoming a good grafter. It seems to be best to graft the youngest larvae possible.
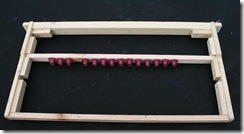 I make my own queen cup bars and frames which is a slightly modified traditional deep frame.
As you can see, the horizontal cell bars are removable so that you can easily place them next to your frame when grafting and then place them back into the cell starter nuc. These dimensions are pretty standard. You want the bar to fit tightly so that it stays in place but still can be removed. The cell bars which old the cell cups have a small grooved cut into the middle to hold the cell cups. Finding the right size saw blade ensures a perfect fit.
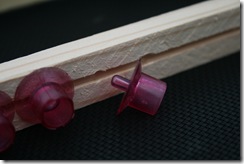 I use a skill saw blade(1/8") thickness. The cups fit tight and have to be wedged into place the first couple of times.
Once the larvae are grafted into the cell cups and placed on the cell bar in the frame, the frame of grafted larvae are ready to be placed into a starter hive. Often, if the trip back to the starter hive is far, the larvae need to be kept in a humid box, to keep them from drying out. A cooler with a wet towel in the bottom is usually plenty of moisture. It is not extremely critical to keep the grafts real warm when they are at this young age.
In my case, the "cell starter" hive is a 5 frame queenless nuc. They have several frames of pollen and honey and a frame or two of young larvae which I retrieve from other hives.
It is very helpful if this starter hive is almost overcrowded. There has to be a lot of bees, packed in, well fed and lots of young nurse bees. They will build out the comb and feed royal jelly to your newly grafted cells. They do this because they know they need a queen, and you have given them the start of queen cells loaded with fertilized larvae and plenty of royal jelly.
Without a queen in this starter nuc, it will die, so I have to monitor their own brood, pollen, honey and growth, using resources from another hive.
So in summary, we chose a hive to graft from, then we graft 1-2 day old larvae into our queen cells and place them into a queenless hive with plenty of bees, pollen and honey. Now, you can leave the cells in the starter hive until they emerge or move them over to what is known as a "finishing hive" where the cells are drawn out fully and sealed.
Now, here's the challenge. You cannot let these queens hatch together. If you do, the first one out will meticulously kill all the other queens in their cells.
In our next lesson, I will discuss grafting tools and techniques, mating queens, saving queens (called banking), how to sell queens and how to ship queens.
Thanks for joining me today, and to contact us, feel free to use the information below. Remember, BEE-have yourself!
 David & Sheri Burns
Long Lane Honey Bee Farms
217-427-2678
www.honeybeesonline.com
david@honeybeesonline.com